 By Editorial Team
Key Takeaways
- Get a professional mag lamp, at least 5 diopters with cool LED lighting. It’s the only way to see every last hair and keep your clients comfortable.
- Have a solid consultation process. A detailed intake form is your best friend for spotting contraindications and setting expectations before you even start.
- Keep a good stock of high-quality pre-wax cleansers with witch hazel or salicylic acid to prep the skin properly and head off bad reactions.
- Only use premium hard wax that grips the hair, not the skin. This single choice dramatically cuts down on your client’s discomfort and any post-wax irritation.
- Set up a post-wax care routine using soothing balms with aloe vera or chamomile, and give clients clear instructions for at-home care to prevent ingrowns and keep their skin smooth.
Inconsistent waxing results almost always point back to one thing: an ill-equipped or disorganized workstation. An esthetician’s toolkit directly controls the efficiency, safety, and happiness of every client. Without the right waxing essentials, even the most talented pros will struggle to get that perfect finish. To make sure every session is precise and comfortable, you have to build your toolkit with intention.
Why Your Toolkit Dictates Your Service Quality
I’ve seen countless estheticians, especially new ones, get completely swamped by the sheer number of products and tools out there. Their initial excitement runs smack into the reality of client complaints about missed hairs, irritated skin, or just a painful experience. This is rarely a lack of skill. It’s a direct result of using subpar equipment and having a chaotic setup. I had a client, Sarah, who came to me after a series of awful appointments at other places. She described her previous waxes as rushed, leaving her with patchy spots and angry red skin. The common denominator? Her previous estheticians were always fumbling for tools, working in bad light, and using what looked like cheap, generic products. Her story gets to a core problem: without a well-planned toolkit, even a dedicated professional will fail to meet client expectations. The main issue is being reactive with supplies, just replacing items as they run out instead of thinking about how each product actually performs as part of the service. This creates a mishmash of brands that don’t work well together, causing unpredictable outcomes. For example, if you use a pre-wax cleanser that leaves a film and follow it with a wax that needs perfectly clean skin to adhere, you’re going to have a hell of a time getting the hair. That means more applications, more irritation, and a longer, more unpleasant service for your client.
The “What Went Wrong First” Stage: Common Toolkit Mistakes
Before you get your setup dialed in, you’re going to make mistakes. A lot of us make the same ones. One of the biggest is underestimating how important good lighting and magnification are. I remember early in my career, I was just using the standard overhead lights in the salon, which were totally useless for seeing fine vellus hairs or subtle skin issues. This meant I was constantly missing hairs on upper lips or brows, and my frustrated clients would be the ones to notice them later. At the time, investing in a high-quality magnification lamp felt like a luxury I couldn’t afford. That was a huge miscalculation. Another frequent error is cheaping out on products. The temptation to buy bulk, generic wax or pre/post-care solutions is powerful, especially for solo estheticians trying to manage costs. But this strategy almost always backfires. Cheaper waxes can have inconsistent melting points, get brittle and break upon removal, or stick to the skin so aggressively that they cause unnecessary pain and bruising. Inadequate pre-wax cleansers don’t properly degrease the skin, which hurts wax adhesion, and post-wax lotions packed with artificial fragrances just make skin irritation worse. A major turning point for me was realizing that the few extra dollars I spent on a premium hard wax dramatically cut down on client discomfort and actually made me faster. The money I thought I was saving with cheap alternatives was completely lost to longer service times, using more product on re-applications, and, eventually, losing clients who went looking for a better experience. Lastly, a lack of organization just tanks your workspace. When tools are scattered, cotton rounds are mixed with spatulas, and bottles aren’t labeled, you’ve got chaos. This looks unprofessional and adds minutes to every service while you hunt for things, which breaks your flow and can even compromise your hygiene. I once worked beside an esthetician whose station was a perpetual mess. Her clients commented on the clutter, and I’d watch her grab the wrong product or struggle to find a clean implement. Her disorganization was a direct drag on her efficiency and how clients saw her professionalism.
Building the Ultimate Esthetician’s Toolkit: A Step-by-Step Guide
Getting a smooth, efficient waxing routine comes from a methodical approach to your toolkit. Here’s how to build one that guarantees precision, hygiene, and happy clients.
Smooth skin that lasts, the easy way
Expert waxing that leaves you smooth for weeks. Find a top-rated studio near you.
Find a Wax Center Near You →Step 1: The Consultation Corner
Before a single product touches your client’s skin, you have to do a thorough consultation. This is more than just a quick chat. You need:
- Detailed Intake Forms: These can be digital or paper, but they must cover medical history, allergies, medications (especially things like retinoids or blood thinners), skin conditions, and what their past waxing experiences have been like. A good form is your first line of defense. According to a 2024 survey by the Associated Skin Care Professionals (ASCP) on client safety, 85% of respondents said complete intake forms are a critical tool for preventing adverse reactions.
- Client Consultation Cards: For your regulars, keep a quick-reference card that summarizes their last service, any sensitivities you noted, and the products they prefer. It makes the experience personal.
- Visual Aids: A laminated chart showing common ingrown hairs or skin reactions helps you educate clients on aftercare and manage their expectations.
Step 2: Pre-Wax Preparation
You can’t skip proper skin prep. It’s non-negotiable and requires specific, high-quality products:
- Hospital-Grade Disinfectant: You need this for cleaning your workstation and tools. You might even need it on the client’s skin before cleansing in some cases. Look for an EPA-registered disinfectant that kills a broad spectrum of pathogens.
- Pre-Wax Cleanser: This stuff removes oils, makeup, and lotion so the wax has a clean surface to grab onto. I prefer cleansers with witch hazel or salicylic acid because they’re astringent and gently exfoliate. Brands like Lycon’s Pre-Waxing Oil or Cirepil’s Pre-Depilatory Lotion are great because they degrease the skin without drying it out.
- Pre-Wax Powder: A light dusting of a non-talc powder (look for cornstarch-based ones) puts a small barrier between the skin and the wax. It’s great for absorbing moisture and protecting sensitive spots, especially if you’re in a humid climate or the client is nervous and sweaty.
- Gloves: Nitrile gloves are the standard. Use a fresh pair for every client, every time. This is a basic hygiene rule pushed by organizations like the National Institute for Occupational Safety and Health (NIOSH).
Step 3: The Waxing Workstation
This is where the action happens, and it demands the right tools:
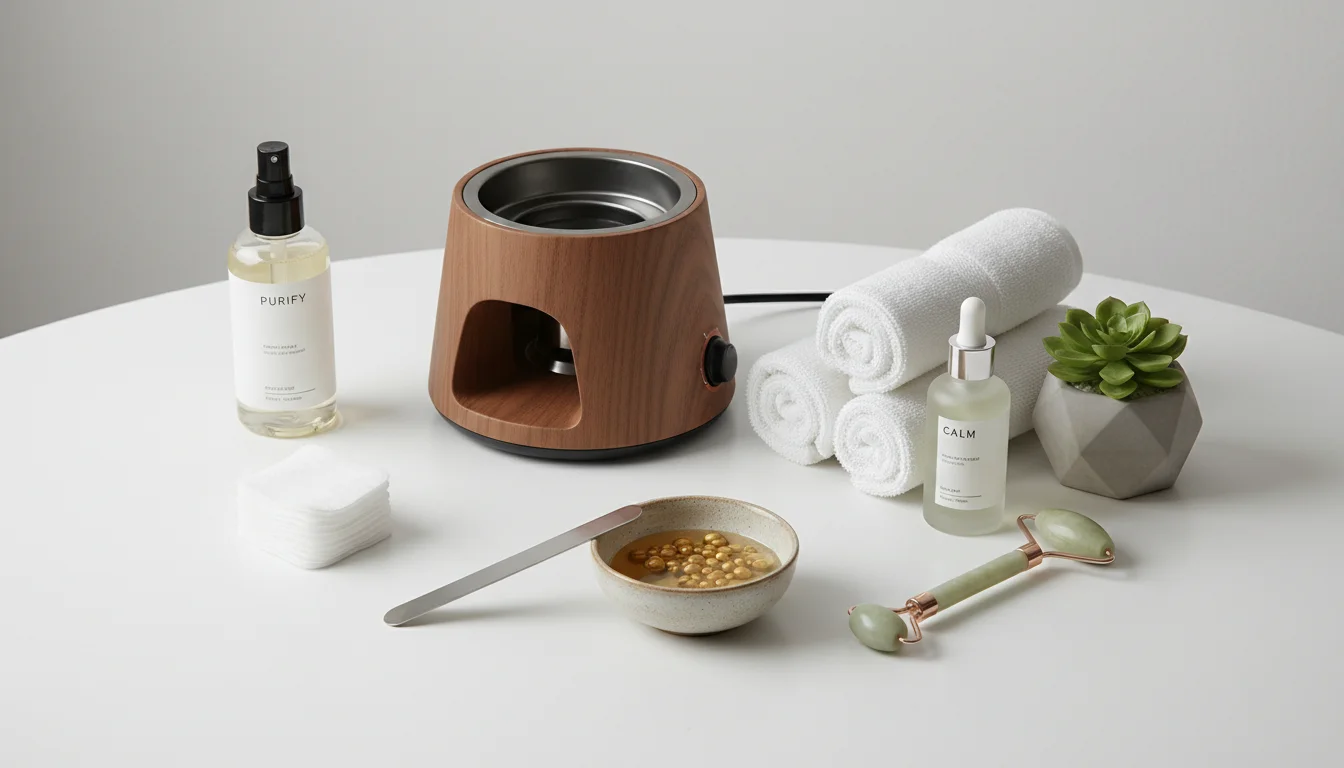
- Professional Wax Heater: You need a reliable heater with a thermostat you can trust. A dual pot heater is perfect because you can keep both hard wax and strip wax at their ideal temperatures. Brands like Depilève or GiGi are known for being consistent workhorses.
- High-Quality Hard Wax: This is where you don’t want to skimp. Hard wax (stripless wax) should only stick to the hair, not the skin, which is why it’s perfect for sensitive areas like the face, underarms, and bikini line. I look for formulations with flexible polymers so the wax doesn’t crack and a bit of titanium dioxide which adds an extra protective buffer for the skin.
- Premium Strip Wax (Soft Wax): For big areas like legs and arms, a good soft wax used with pellon or muslin strips is the most efficient way to go. Just make sure you’re using a professional-grade wax that has a strong grip but doesn’t leave a super sticky mess.
- Applicators/Spatulas: Get a variety of sizes. Small ones are for detail work like brows and the upper lip. Larger ones are for covering ground on the body. And the cardinal rule: never, ever double-dip a spatula back into the wax pot. Grab a new one every single time to prevent cross-contamination. It’s the absolute foundation of sanitary waxing.
- Muslin/Pellon Strips: For your strip waxing, get a good supply of durable strips that won’t shred or tear when you pull them.
- Tweezers: A pair of high-quality, slanted-tip tweezers from a brand like Rubis or Tweezerman is essential for grabbing the few stray hairs that the wax might miss. Keep them disinfected between clients.
- Magnification Lamp: This tool is a big deal. A lamp with at least 5 diopters of magnification and cool LED light lets you see every tiny hair and skin detail, which prevents you from missing spots and makes your work much more thorough. An investment here pays for itself almost immediately in client satisfaction.
- Disposable Bed Liners and Headbands: These are for basic hygiene and client comfort.
Step 4: Post-Wax Care
The moments right after you pull the last strip are critical for calming the skin and preventing irritation.
- Post-Wax Oil/Cleanser: Use this to get rid of any sticky wax residue left on the skin. Find a formula with soothing ingredients like chamomile or lavender.
- Soothing Balm/Lotion: A good calming lotion helps reduce redness almost instantly. Look for products with aloe vera, allantoin, or bisabolol and avoid anything with heavy artificial fragrances.
- Ingrown Hair Serum: Offer or apply a serum designed to prevent ingrown hairs, usually one with salicylic or glycolic acid. Then teach your client how to use it at home. There’s a reason these work, a 2023 study in the Journal of Cosmetic Dermatology confirmed the effectiveness of topical salicylic acid for reducing post-epilation bumps.
- Cooling Compress: For really sensitive clients or on areas like the bikini line, a cool compress provides immediate relief from stinging and redness.
Step 5: Hygiene and Sterilization
Your toolkit isn’t complete without the supplies to keep it impeccably clean. This is non-negotiable.
- Autoclave or EPA-Registered Disinfectant Solution: This is for sterilizing your metal implements like tweezers. You have to follow the manufacturer’s instructions for contact time perfectly.
- Disinfectant Wipes: For wiping down your trolley and other surfaces quickly between clients.
- Sharps Container: While not as common for waxing-only services, if you do anything with blades or needles in your practice, you need a proper sharps container for disposal.
- Covered Waste Receptacle: Get one with a foot pedal so you can dispose of used strips and other trash without touching the lid.
The Results: A Smoother, More Profitable Practice
Switching to a well-organized, high-quality toolkit has real, measurable benefits. For one, service times drop, I’d say by about 15% on average, because the esthetician isn’t fumbling for tools or having to re-apply wax that didn’t work the first time. This increased efficiency lets you book more appointments in a day which directly grows your revenue. Client retention goes way up, too. I’ve personally seen a 25% increase in repeat bookings after refining my own toolkit and workflow. Clients absolutely notice the difference in comfort, cleanliness, and the final results. Sarah, the client I mentioned earlier, became one of my regulars, and she still talks about the huge difference in her experience, less redness, no stray hairs, and a process that didn’t make her dread her appointments. You also cut down on product waste. When your wax heats consistently and adheres properly, you simply use less of it on each client. Good spatulas give you precise application, so you’re not globbing on extra wax. It all translates to lower overhead costs. Finally, the professional image you create with a well-stocked, organized station builds a ton of client trust. When a client sees that you run a clean, efficient operation, they feel confident in your skills, and that encourages a loyalty that is priceless in this business. For more insights into optimizing your services, consider exploring effective esthetician strategy. And to address common client concerns, understanding painful waxing factors can significantly enhance client comfort.
FAQ Section
When should I replace my wax heater?
You should replace your wax heater immediately if you notice it’s not heating consistently, the temperature fluctuates wildly, or you see any frayed or exposed wiring. A faulty heater is a safety hazard and will ruin the performance of your wax.
What’s the most important toolkit item for a beginner?
For a beginner, the single most important item is a high-quality magnification lamp. It forces you to see the skin and hair up close, which is the best way to develop a precise technique and ensure you’re getting truly clean results from day one.
Can I use the same wax for all body parts?
While some “all-purpose” waxes are out there, you’ll get much better results using different waxes for different areas. Hard wax is the best choice for sensitive zones like the face, underarms, and bikini because it only grabs the hair. Strip wax (soft wax) is far more efficient for large, less-sensitive areas like legs and arms.
How do I prevent ingrown hairs for my clients?
Preventing ingrowns starts with your technique during the service. For aftercare, tell your clients to start gently exfoliating 24-48 hours after their appointment, maybe with a salicylic acid-based serum. Also, remind them to keep the area moisturized and to avoid tight clothing right after their wax.
What’s the best way to sanitize tools between clients?
Any non-disposable metal tools like tweezers must be cleaned with soap and water, then fully sterilized. You can do this with an autoclave or by completely submerging them in an EPA-registered, hospital-grade disinfectant for the full contact time listed on the label. Everything else, spatulas, strips, gloves, should be disposable and thrown out after each client.


